首先確認以下安裝步驟:
安裝步驟
- git clone 該專案 Stable Diffusion Webui https://github.com/AUTOMATIC1111/stable-diffusion-webui
- 確認安裝 Python 3.10.8
- 選擇使用 chilloutmix model, model 由 https://civitai.com/ 下載
操作步驟
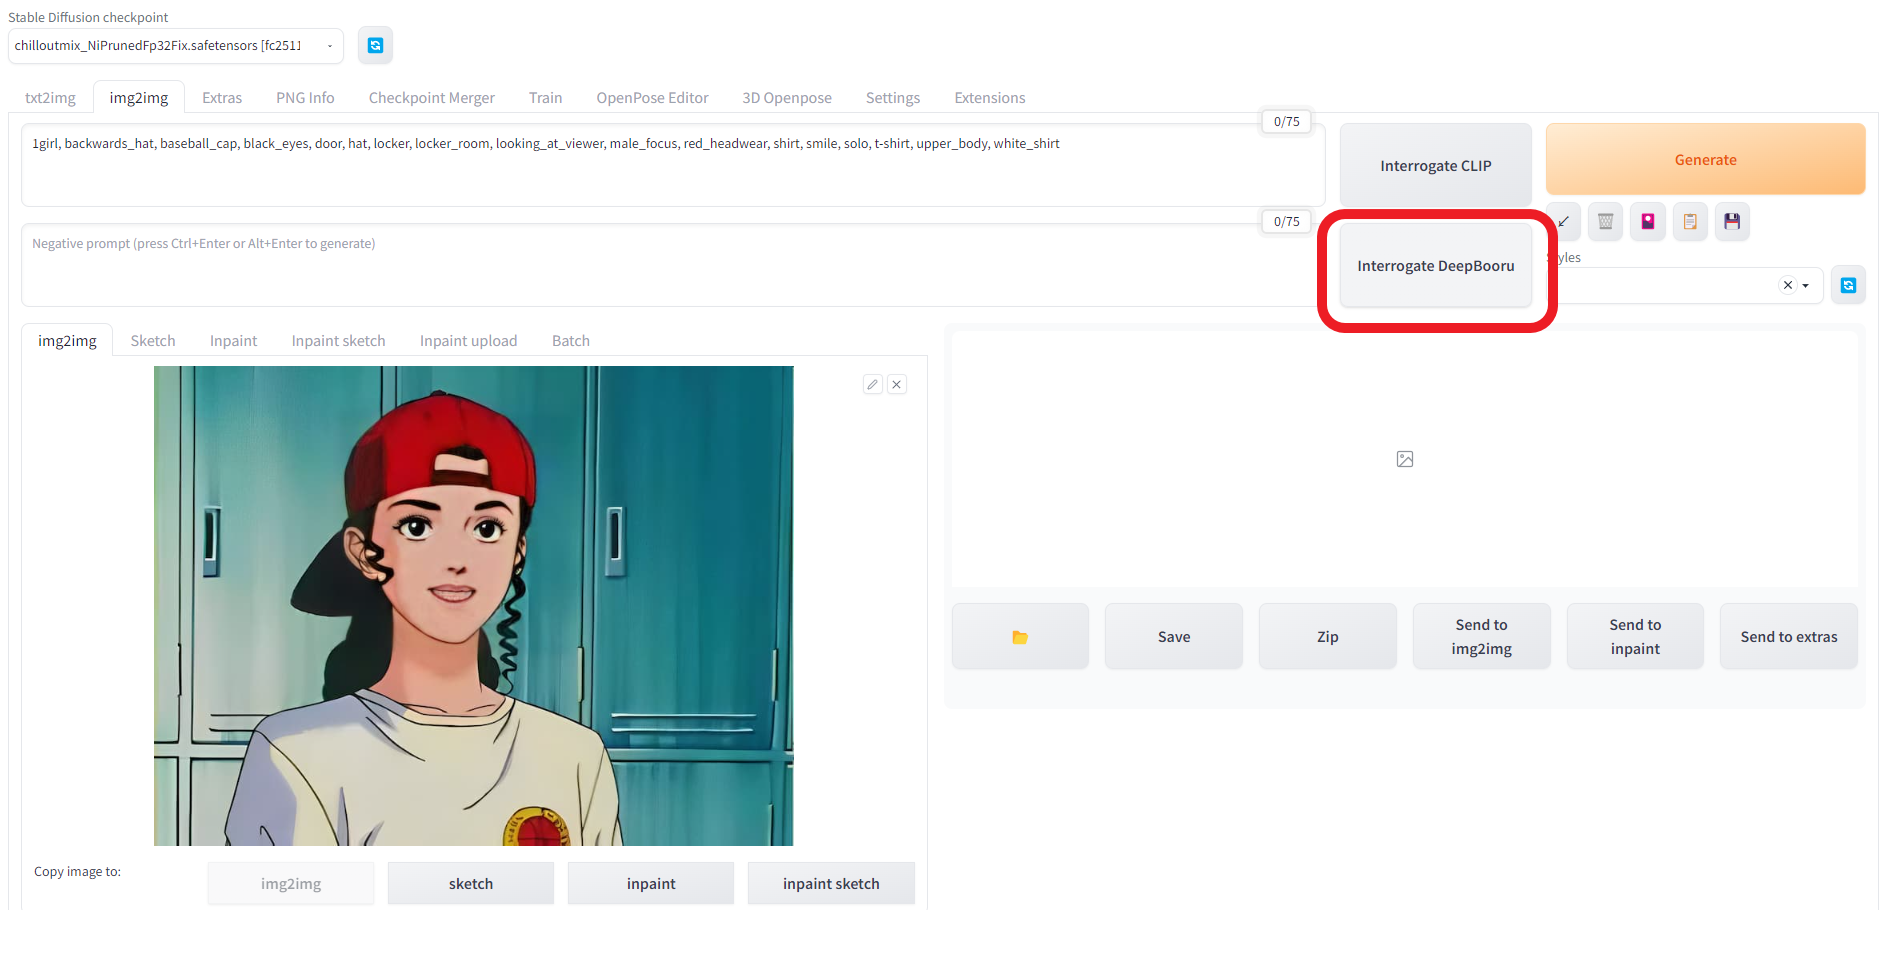
- 安裝完成後點選 img2img Tab
- 上傳要轉檔的圖片,點選 " interrogate DeepBooru " ,讓 Stable Diffusion 從圖片辨識文字描述

參數設定
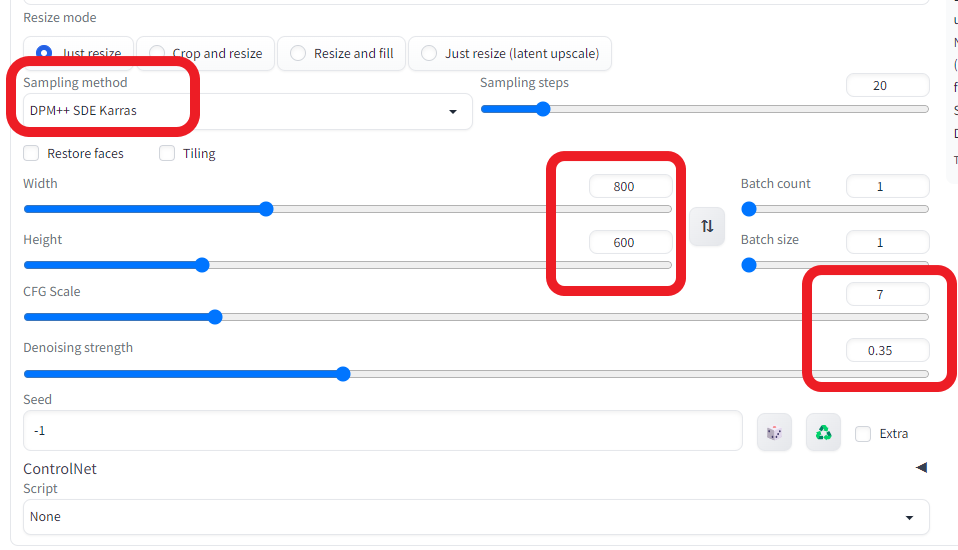
- 設定圖片大小,讓它與原圖一致 ( 範例為 800x600 )
- CFG Scale 設置 -> 7
- Sampling method -> DPM++ SDE Karras
- Denoising strength -> 0.35左右 ( Denoising strength = 讓 AI 腦補的程度 : 數值愈大愈像真人,但與原圖落差會更大 )

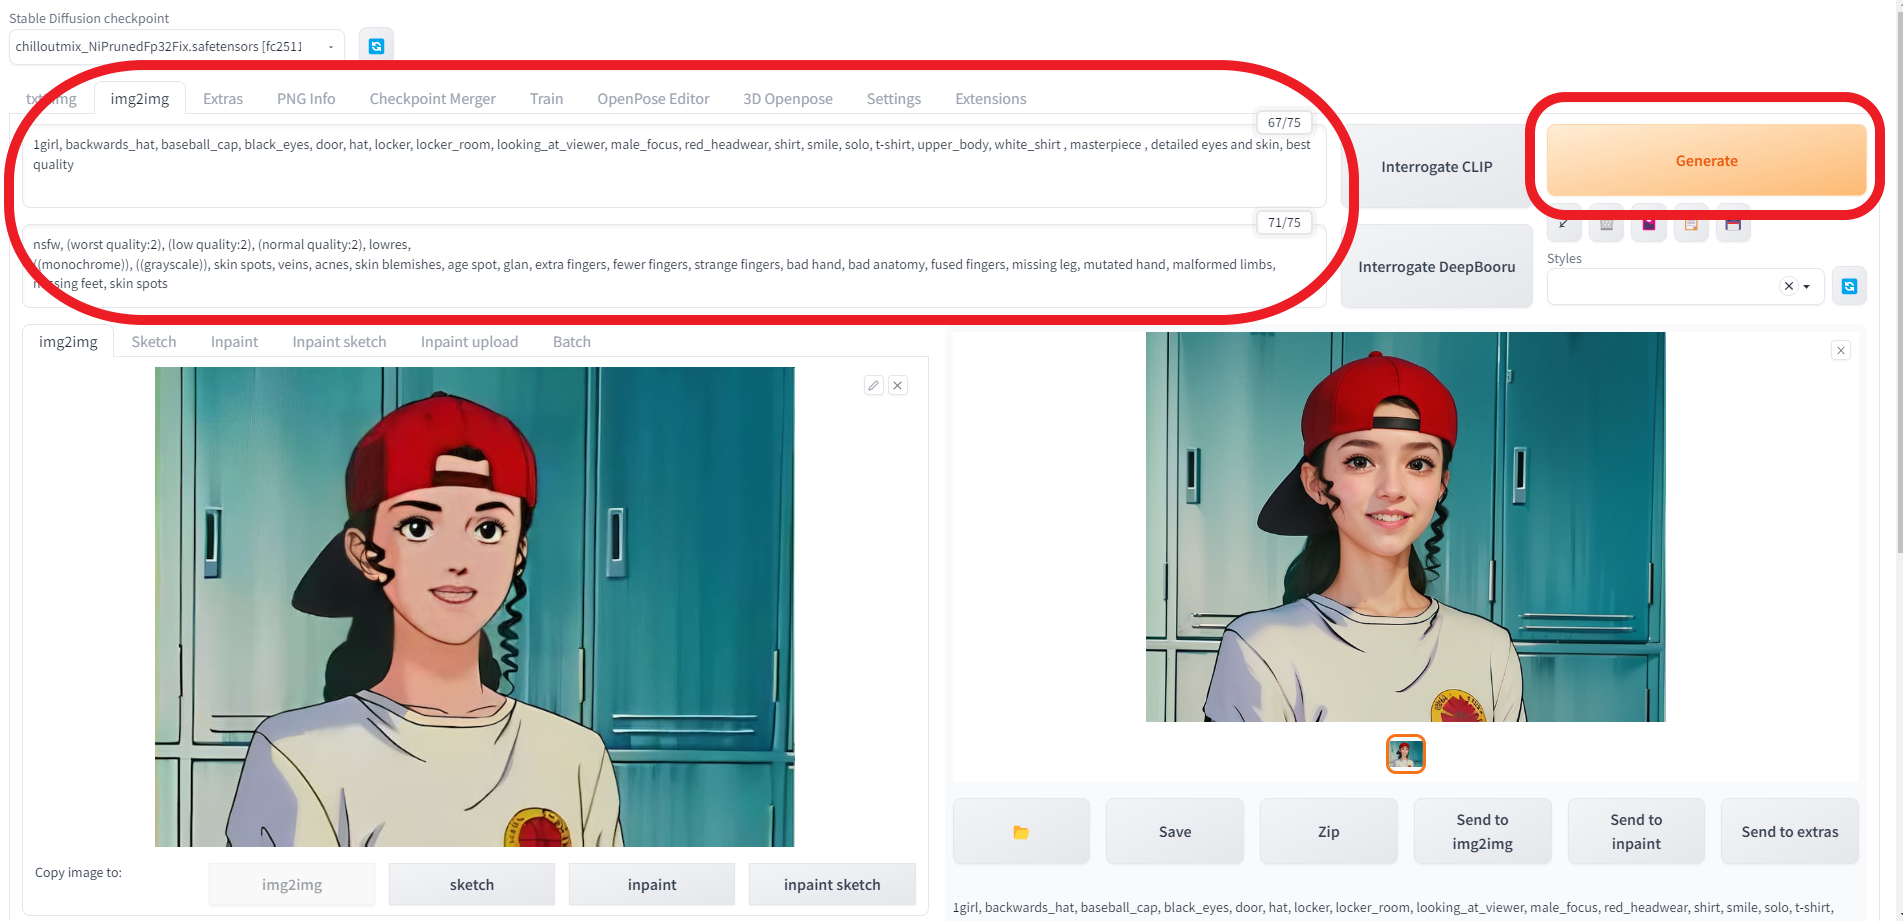
- 正面提詞 :外加 masterpiece , detailed eyes and skin, best quality
- 負面提詞 :nsfw, (worst quality:2), (low quality:2), (normal quality:2), lowres, ((monochrome)), ((grayscale)), skin spots, veins, acnes, skin blemishes, age spot, glan, extra fingers, fewer fingers, strange fingers, bad hand, bad anatomy, fused fingers, missing leg, mutated hand, malformed limbs, missing feet, skin spots
- 按下 Generate ,即可生成

參考資料
安裝細節若不清楚,可參考 電腦王阿達這隻影片